R6 Lesion Guide 2026: Best Loadout, 25s GU Mines and Placement Plan
Turn every regenerated GU Mine into route information, forced hesitation and a cleaner late-round defense with the right loadout and deployment rhythm.
What is the best way to play Lesion in R6 Y11S2.2?
Use the T-5 SMG and Super Shorty as the strongest general loadout, then choose the Observation Blocker or Bulletproof Camera around the site’s information plan. Place early GU Mines on routes the attack must cross, save later refills for the execute layer and reposition when a trigger reveals the push. In Y11S2.2, another mine arrives every 25 seconds, so staying alive creates more value than taking an unnecessary opening duel. Spread coverage across time and space: one precise mine that forces a needle removal during the execute is more useful than several traps stacked where a single drone can expose them.
Build the R6 account around your next Ranked defense.
Compare Operators, ranks and rare skins in a protected account shop with clear filters and instant delivery.
Lesion’s Y11S2.2 buff reduces GU Mine refill to 25 seconds
Y11S2.2 shortens Lesion’s GU Mine refill from 30 seconds to 25 seconds. Ubisoft’s Designer’s Notes frame the change around long-term presence: faster access to mines means useful traps can remain relevant deeper into a round. The change does not make careless placement stronger. It makes every second Lesion survives more productive.
The five-second reduction repeats across the round. That improves the rhythm between the first layer of route coverage and the mines reserved for late pressure. A Lesion eliminated in the opening fight stops this resource engine. A Lesion who plays a safe supporting position can react to calls, replace cleared coverage and still hold a strong weapon for the execute.
Long gaps made survival important and limited how quickly a cleared route could be covered again.
More frequent resources create better mid- and late-round coverage when Lesion stays alive.
Spend enough early to gather route information, then reinforce the lane the attack actually chooses.
The best Lesion loadout starts with the T-5 SMG and Super Shorty
For most Ranked rounds, use the T-5 SMG, Super Shorty and a site-specific secondary gadget. The T-5 covers more engagement distances than the shotgun and lets Lesion play behind his information without being locked into one doorway. The Super Shorty handles rotations, head holes and compact site adjustments before the action starts.
The SIX12 SD is a deliberate alternative for close positions where attackers must enter shotgun range. The Q-929 can replace the Super Shorty when teammates have already completed every required piece of site geometry, but giving up the pocket shotgun reduces independence. Observation Blocker and Bulletproof Camera are both valid; the correct choice depends on whether the defense needs denial of attacker vision or an additional durable observation angle.
Supports short and medium fights while Lesion rotates between trap information and the execute position.
Choose only when the hold reliably compresses attackers into shotgun distance and another player covers long lines.
Creates rotations and small lines without forcing Lesion to use the SIX12 SD as his main fighting weapon.
Use when all geometry is already covered and a standard emergency sidearm has more value for the plan.
Protect a defender position, trap lane or rotation from a simple drone view without replacing active drone denial.
Watch a key approach or execute lane when the team can access the camera safely and act on its call.
T-5 SMG vs SIX12 SD: choose flexibility unless the hold proves otherwise
The T-5 SMG is the reliable default because Lesion’s information can pull him between several lanes. A mine may trigger one room away from the position he expected to defend. A flexible automatic primary lets him rotate, challenge a medium line or support a teammate without rebuilding the entire round around shotgun distance.
The SIX12 SD becomes attractive when geometry has already solved the distance problem. Tight stair landings, compact rooms and shield-assisted doorway holds can create repeatable close fights. The suppressed report may make the first shot less obvious, but that benefit does not compensate for an open lane. Never choose the shotgun merely because Lesion is a trapper; choose it because the site forces the engagement.
Best for flexible anchors, shallow roams, crossfires and rounds where GU information may require a medium-range response.
Best for rehearsed close holds with protected movement, forced doorways and teammates covering every longer sightline.
- Pick the T-5 when you do not know exactly where the final fight will happen.
- Pick the SIX12 SD when the setup forces the enemy through a short, isolated lane.
- Do not mix roles: a long crossfire and a shotgun plan solve different problems.
- Test the hold: if attackers can back away and fight from range, return to the T-5.
Super Shorty, Q-929, Observation Blocker and Bulletproof Camera
The Super Shorty is the default secondary because it turns Lesion into a self-sufficient setup Operator. Create only the geometry the plan needs: one rotation, one safe line for a camera call or a compact opening that lets a defender fall back. Random holes increase exposure and can reveal the position that was meant to exploit a GU trigger.
Use the Q-929 when a teammate with a shotgun has already committed to setup and you want a conventional backup. For the secondary gadget, the Observation Blocker helps hide a position or route from drones, while the Bulletproof Camera adds a durable source of visual information. Neither should be placed automatically. Connect the tool to the same lane as the GU network so the team understands what a trigger means.
Place it where a blocked drone view conceals a defender position, a mine-adjacent lane or a safe rotation. It is most useful when attackers cannot simply drive around it for the same angle.
Cover an approach, breach or plant zone that teammates can watch without abandoning their guns. A GU sound plus a camera call is clearer than either signal alone.
How GU Mines work: trigger, poison, movement limit and removal window
A GU Mine becomes a decision trap when an attacker steps into it. Under Ubisoft’s official reworked behavior, the trigger deals five initial damage, followed by twelve poison damage every two seconds until the attacker removes the needle. The effect limits movement, so the target cannot treat it as harmless background damage during a fast push.
The mine no longer relies on cloaking, and the HUD does not hand Lesion a remote icon for every deployed trap. That makes placement memory, sound and team communication important. Ubisoft also specifies that IQ cannot detect the GU Mine. If an already affected attacker triggers another GU, the poison timer resets and poison damage applies immediately. Stacking several mines in one obvious tile is still inefficient because careful clearing can remove the whole investment.
The first contact confirms the route and begins the forced decision.
Damage continues until the affected attacker removes the needle.
The attacker loses freedom to sprint through the execute as planned.
Another GU applies poison damage immediately and restarts the poison timing.
The tactical value is not only damage. The sound and slowed route create a short information window. Lesion should already know what action follows: swing with a teammate, hold the exit, rotate one room closer or do nothing and preserve the crossfire. A trigger without a prepared response is only partial value.
Manage the 25-second GU Mine refill without wasting the eight-mine capacity
Lesion can hold up to eight GU Mines, and Y11S2.2 produces another every 25 seconds. The correct rhythm sits between two bad extremes: placing every mine immediately makes the network easy to read and leaves nothing for the chosen attack lane, while holding a full inventory wastes future generation and gives the team no information.
Start with meaningful route coverage, then use the preparation and early action phase to learn the attack direction. When the next mine becomes available, reinforce the lane that matters or replace utility the attackers cleared. Before the final minute, prioritize plant routes, narrow entrances and safe fallback lines. The timer is not a reason to sprint into danger just to place a mine; a dead Lesion generates nothing.
Use enough mines to identify the likely side without revealing the whole defense.
At every quiet moment, confirm whether a new 25-second resource is ready.
Use drones, calls and cleared utility to identify the real push.
Add mines behind the first contact point so clearing one does not solve the route.
Respond to the trigger from cover instead of chasing the sound blindly.
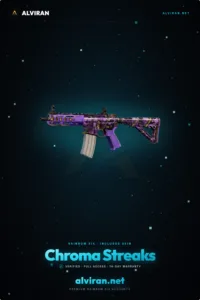
Compare skins without losing sight of account protection.
Browse Black Ice, Chroma Streaks and other inventory filters, then review the protection and support terms before choosing.
Place GU Mines for decisions, not random floor coverage
Good GU Mine placement begins with a question: what decision should this trigger force? A mine on a must-cross doorway can stop a sprint and expose the entry. A mine just behind the first safe threshold can catch an attacker after they believe the route is clear. A late mine near a plant path can consume the few seconds an execute cannot spare.
Avoid the exact center of a brightly lit, open doorway when a drone or attacker can see it from far away. Use clutter, shadows and changes in floor texture where possible, but do not sacrifice the actual trigger path for visual cleverness. Leave enough distance between mines that one scan, explosive or cautious clearing action does not solve multiple layers.
Best when the attacker cannot bypass the tile without abandoning the intended route.
Punish the assumption that one cleared doorway means the full approach is safe.
Force a removal or impaired movement exactly when time and attention are limited.
- Separate the mines: create sequential decisions instead of one concentrated utility pile.
- Protect the response: hold from cover where the trigger gives an advantage but does not force a reckless swing.
- Move after exposure: if attackers learn the pattern, shift the second layer on the next round.
- Respect teammates: do not place a trap where a defender’s body or shield prevents the intended trigger.
- Track cleared routes: a destroyed mine still tells the team where attackers invested attention.
A complete Lesion round plan from setup to the final execute
Lesion should play each round as a growing information network. Prepare compact site geometry, establish the first route layer, then survive long enough to move new mines toward the real pressure. The ideal position is close enough to convert a trigger but safe enough that a missed timing does not end the resource engine.
Use the Super Shorty, place the selected secondary gadget and agree on the lanes teammates will watch.
Cover must-cross routes, avoid an unnecessary spawn-facing duel and listen for early clearing.
Replace cleared coverage, add a second layer and communicate every trigger with a precise location.
Hold the plant route, deny an easy needle removal and fight through the team’s established crossfire.
When a GU triggers, call the exact doorway, direction and whether you can act. “GU on east door, one entering, no swing” is more useful than “Lesion mine.” If the attacker is isolated and a teammate can trade, pressure the removal animation. If several attackers are ready to refrag, keep the crossfire and let the poison consume their attention instead.
Lesion can anchor or play a shallow off-site position, but a deep roam often fights against his gadget. Long rotations delay new placement, and an early death removes future mines. If the team needs roaming fundamentals, separate that job from this Operator-specific plan with the complete R6 roaming guide.
Best Lesion synergies turn a GU trigger into a controlled fight
Lesion works best with defenders who either protect his response position or add another consequence to the same route. The goal is not to create an unreadable pile of gadgets. It is to make the attacker solve one layer, move into the next and face a defender who already understands the timing.
A Banshee can slow and announce the approach while a separated GU creates the removal decision deeper in the lane.
Projectile defense can preserve a shield, camera or defender position used to convert the GU information.
Jammers can restrict simple drone access, making it harder to identify every mine and defender response before entry.
Late GU pressure and toxic area denial both punish an execute that has already spent too much time.
Visual information clarifies whether the trigger represents one isolated attacker or the full push.
A nearby teammate makes the swing safer and prevents the affected attacker from receiving an easy isolated duel.
How attackers counter Lesion and the mistakes that make it easy
Attackers reduce Lesion’s impact by droning common thresholds carefully, clearing utility with the appropriate tools and preserving enough round time to stop and remove a needle. A rushed team gives every trap more value. A coordinated team identifies the first layer, calls the defender response and enters with a trade plan.
Lesion should expect adaptation. After a trap catches an attacker, that route becomes a prefire and drone priority on the next round. Move the mine a few steps deeper, change the response angle or use the known clearing path to build a different crossfire. Repeating the same visible doorway stack turns useful information into a predictable habit.
An unnecessary opening duel removes every future 25-second refill and leaves early mines without a coordinated response.
One careful clear can erase several resources, while the rest of the approach remains uncovered.
A full eight-mine storage means another regeneration window cannot improve the defense.
The sound is information, not a command. Attackers may be holding the response for an immediate refrag.
A SIX12 SD hold fails when attackers can stay outside the forced close engagement.
A teammate cannot act on “mine went off” without a room, doorway and push direction.
A 15-minute Lesion practice routine for better GU placement
Mechanical practice matters, but Lesion improves fastest when every mine has a written purpose. Choose one Ranked site and rehearse the setup in a custom session. Record the route each mine watches, the safe position that responds and the replacement location if attackers clear the first layer.
- 3 minutes — geometry: create the essential rotation and sightline with the Super Shorty without wasting shells.
- 4 minutes — route map: identify three must-cross tiles, two secondary paths and one late plant route.
- 3 minutes — concealment: compare mine visibility from standing, crouched and drone-height approach angles.
- 3 minutes — response: move from each trigger location to a protected fight or crossfire without exposing to another lane.
- 2 minutes — review: remove any mine that has no specific call, timing or defender response attached to it.
After Ranked, review only three questions: Did you die before later refills mattered? Did the team understand every trigger? Did a full inventory waste time? Those answers produce more useful adjustments than copying a static placement list without understanding the site.
R6 Lesion FAQ for Y11S2.2
Is Lesion good in Rainbow Six Siege in 2026?
Yes. Lesion is a strong information and trap defender because surviving GU Mines keep appearing throughout the round, mark where pressure is developing and force affected attackers to choose between fighting while slowed or stopping to remove the needle.
What was Lesion’s Y11S2.2 buff?
Y11S2.2 reduced the GU Mine refill time from 30 seconds to 25 seconds. This gives Lesion more frequent resources and improves his ability to keep important routes covered deeper into the round.
How fast do Lesion GU Mines refill in Y11S2.2?
Lesion receives another GU Mine every 25 seconds in Y11S2.2, down from 30 seconds. A faster timer rewards survival, but Lesion still needs to deploy mines before reaching the maximum stored inventory.
How many GU Mines can Lesion have?
Lesion can hold up to eight GU Mines. Because new mines regenerate over time, he should place useful coverage throughout the round instead of carrying a full inventory or spending every mine in the opening seconds.
How does a Lesion GU Mine work?
A triggered GU Mine deals five initial damage and then twelve poison damage every two seconds until the attacker removes the needle. The effect limits movement, and triggering another GU while already poisoned resets the poison timer and applies poison damage immediately.
What is the best Lesion loadout in 2026?
The best general Lesion loadout is the T-5 SMG, Super Shorty and the secondary gadget that solves the site’s information plan. Use the Observation Blocker to deny drone sightlines or the Bulletproof Camera when the team needs durable visual information.
Should Lesion use the T-5 SMG or SIX12 SD?
Use the T-5 SMG for the most flexible general Ranked setup and fights across several distances. Choose the suppressed SIX12 SD only for a planned close-range hold where the site geometry reliably forces attackers into shotgun range.
Should Lesion bring an Observation Blocker or Bulletproof Camera?
Bring the Observation Blocker when denying a key drone sightline protects a trap route or defender position. Bring the Bulletproof Camera when the team needs durable information on an approach, breach or execute lane and has a safe way to watch it.
How do attackers counter Lesion?
Attackers counter Lesion by droning likely choke points carefully, using explosive or utility-clearing tools where appropriate, moving with enough time to remove a needle safely and avoiding a rushed execute through several unchecked doorways.
Related Rainbow Six Siege guides
Find the R6 inventory that fits your Ranked goals.
Compare rare skins and account filters in one place, with protection terms and support links visible before checkout.